
Soil Sensor Absorb
The Absorb soil sensor measures the temperature (°C) and water potential of the soil (cbar). In addition to monitoring soil water potential, the sensor is suitable for irrigation management and irrigation systems. Its advantage is that calibration to soil type and soil chemistry is not necessary. The sensor is available in two versions - on a 1 m long rod and a wire version for burying in the soil for better concealment in the field.
We send the sensors to customers revived, but the calibration must be done immediately before the actual installation in the field.
Sensor recovery
If the sensor comes directly from the factory, the sensor must be revived by inserting a battery and waiting for the first message that the device sends every 30 to 60 minutes.
Remove the back cover of the data transmitter - handle the motherboard with extreme care, it is susceptible to mechanical and electrostatic damage.
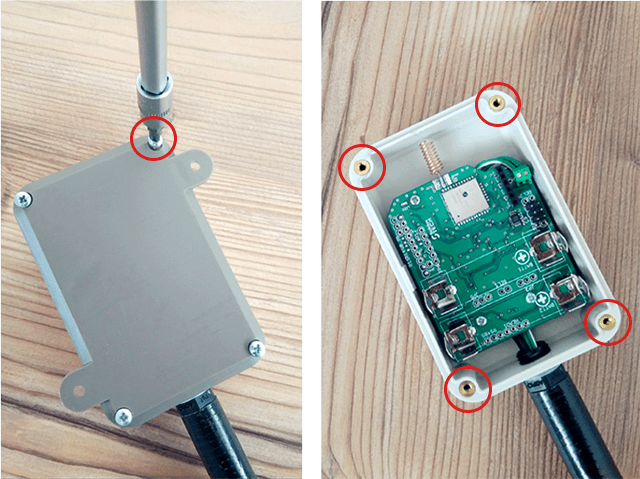
Fig. 1: Assembly and disassembly of the data transmitter cover
Insert a 3.6V AA pencil battery into one of the prepared slots, the polarity is marked on the motherboard. When the battery is inserted, the sensor will be indicated by a green LED flashing on the dashboard. If the indication does not occur, remove the battery and reinsert it into the device (select a different battery slot). Increase the life of the device by inserting batteries in both slots.
Note: When using two batteries, care should be taken to ensure that they have the same voltage.
We recommend always inserting new batteries!
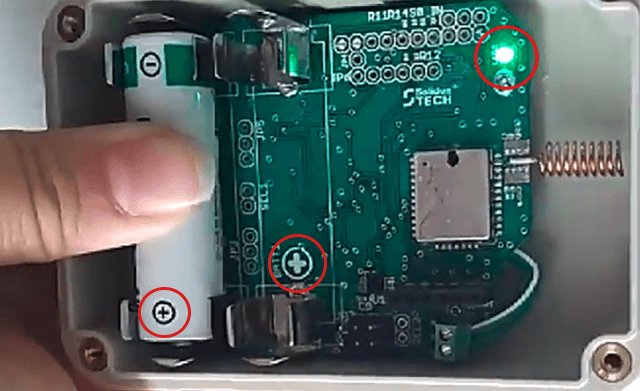
Fig. 2: Battery slots and status LED
Fit the back cover - to prevent moisture from entering the device, it is essential that the cover is perfectly aligned with the body, the protection rating of the data transmitter is IP65.
If the sensor stops transmitting messages, you can restart the device in the above manner by removing and reinserting the battery after approximately 5 seconds.
Calibrating the sensor
The sensor is made of a porous substrate that contains air-filled pores. In order for the sensor to function properly and achieve maximum measurement accuracy, it is necessary to replace this air with water.
Recommended hydration procedure for the Watermark sensor:
- Moisten the sensor by immersing less than half of the sensor volume in a container of clean water - see Figure 3. Ideally early in the morning for 30 minutes. Submerging the entire volume would seal the air inside the pores and the entire procedure would have to be repeated once the sensor is dry. Immersing a portion of the volume will allow air to escape from the pores and capillarity will ensure gradual absorption of the liquid throughout the volume.
- Allow the sensor to dry until the evening hours.
- In the evening, wet the sensor a second time for 30 minutes in the same manner.
- Allow the sensor to dry overnight.
- The next morning, wet the sensor a third time for 30 minutes in the same manner. Allow to dry all day until the evening.
- Finally, immerse the entire sensor volume in water overnight and the perfectly moistened sensor is ready for installation on the third morning.
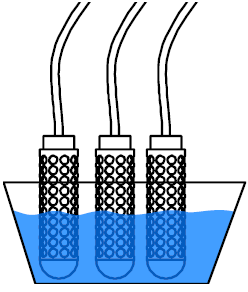
Fig. 3: Soil sensor hydration by soaking the sensor in water
The status of the sensor can be continuously monitored in the CleverFarm app. The measured values will range from -200 cbar for a perfectly dry sensor to 0 cbar for a perfectly wet sensor.
Sensor installation
The sensor should be installed properly humidified after the hydration procedure described above. Never install a dry sensor in the soil! Maximum sensor measurement accuracy will be achieved after two or more additional irrigation cycles to help establish an equilibrium condition between the sensor and the surrounding soil.
The placement of the sensor in the soil is as follows. Dig a hole and place the sensor at the desired depth. The sensor is oriented vertically in the case of a rod sensor or horizontally in the case of a wire sensor.
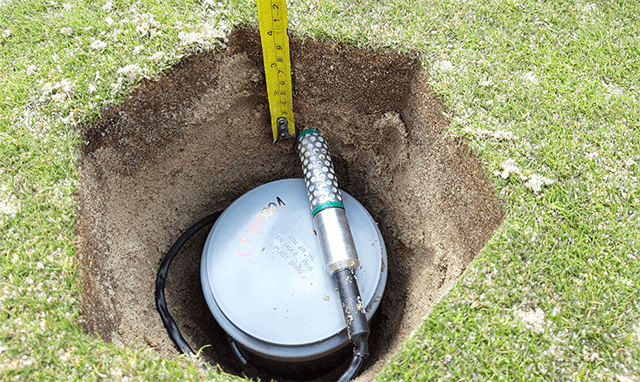
Fig. 4: Positioning the wire "golf" sensor to a depth of 10cm
Mix the excavated soil with water and gradually fill the hole with this thick "mortar-like" mass without coarse structures. The individual layers are compacted so that the soil sensor is perfectly connected to the surrounding soil without air gaps. Capillary rise is influenced, among other things, by the mutual homogeneity of the soil, so when filling the hole, ensure that the soil composition in each layer is the same. The sensor should be mechanically stable and show short-term values of -15 to 0 cbar when properly installed.
Tip: You can use a trick you know well from planting trees. Press the sensor flat against a cut in the soil where the preparation of the hole has not disturbed the soil and capillary rise. The procedure for filling the hole is the same, see above.
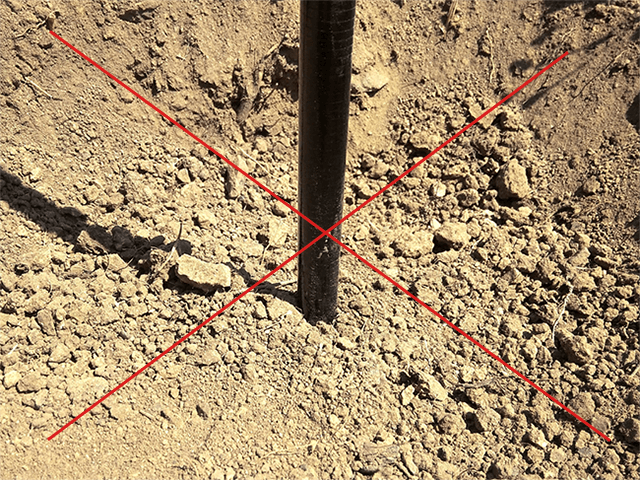
Fig. 5: Installing the sensor in the soil "dry" - definitely NOT like this!
The depth of the soil sensor depends on the root system of the crop being monitored. Contact our sales team for more information on its placement and recommended threshold for irrigation.
You can also consult application support for general information about the values measured by our sensors.
As a supplement to these instructions, you can watch a simplified video tutorial.
Note: The device is functional at temperatures from -20° C to 60° C. Frost will not damage the device, however, exposure of the sensor to adverse climatic conditions may cause the functional life of the soil sensor to be near the lower end of the normal 2 to 5 year lifespan. We recommend removing the sensors from the soil during the winter to extend the life of the soil sensor.
Sensor activation
The final step is to activate the soil sensor in CleverFarm, which is described in detail in the Sensors article.
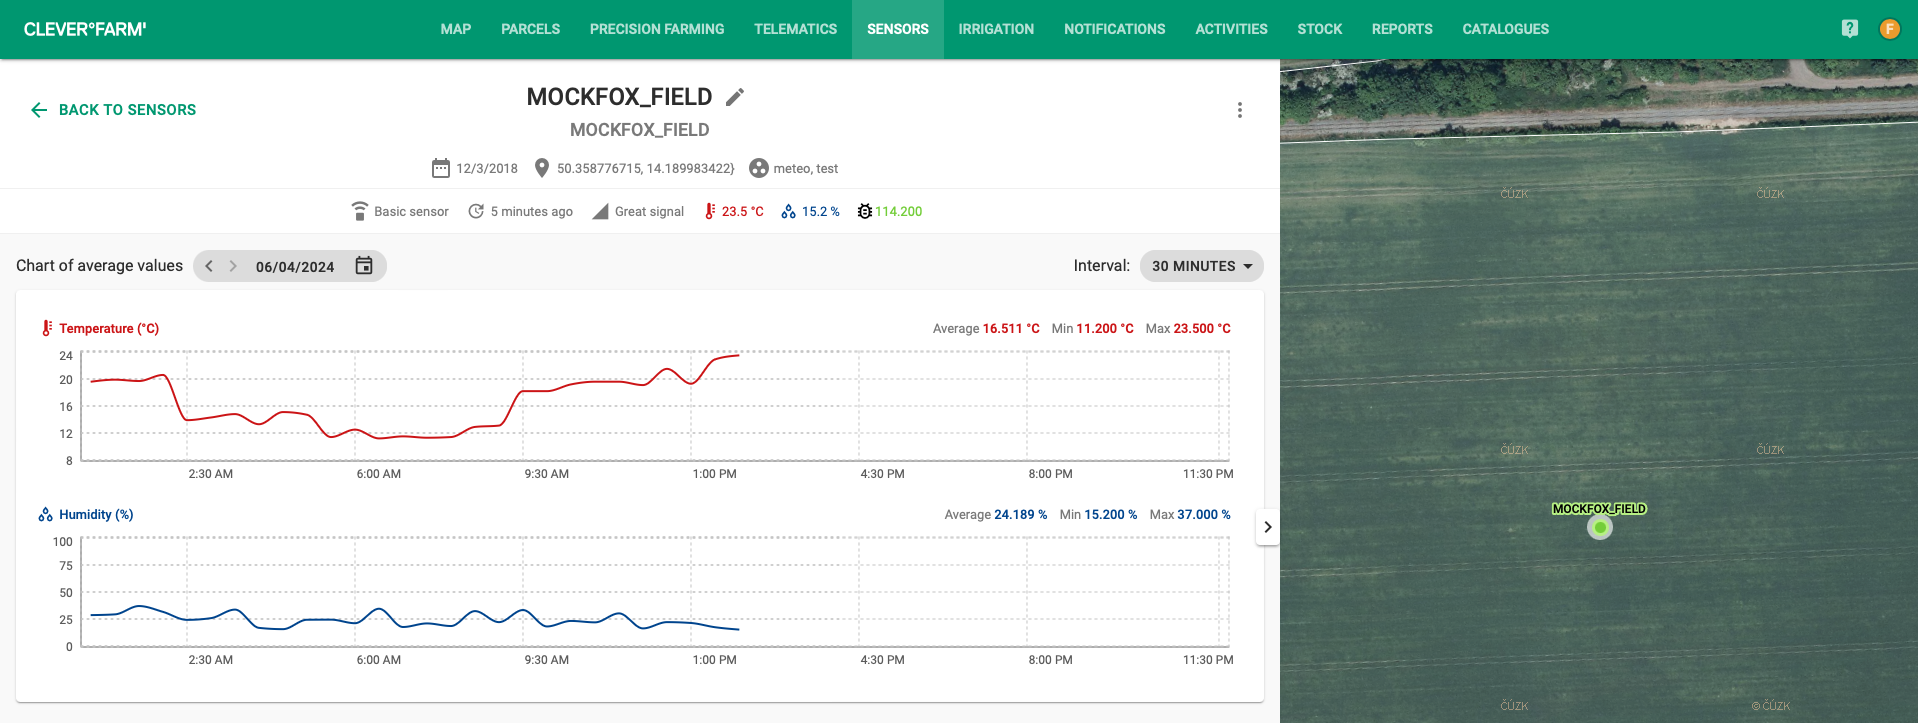
Fig. 6: Soil sensor in CleverFarm